How to Print Shrink Sleeve Labels with the Right Printer
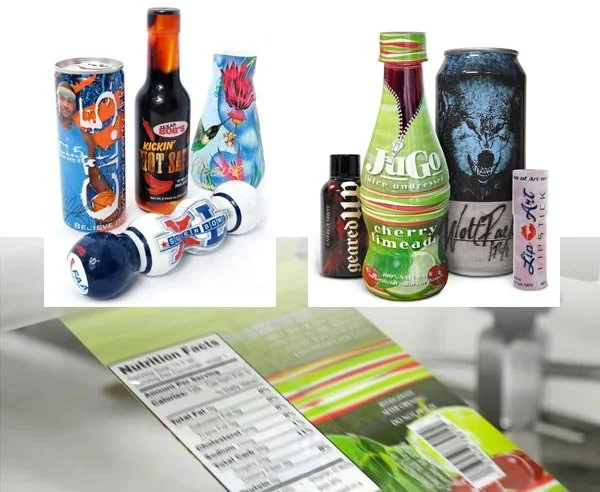
Shrink sleeve labels are quickly becoming one of the most popular packaging choices across industries. Why? Because they do what traditional labels can’t. By wrapping seamlessly around any shape… bottles, cans, jars, or containers! Shrink sleeves deliver bold 360-degree graphics that transform your product’s shelf appeal. With the right design and printer, you can give your products a sleek, professional finish that stands out.
Their versatility makes them a smart solution across many markets:
Beverages: Craft beer, energy drinks, juices, and water bottles
Cosmetics: Sleek packaging that highlights branding
Food Products: Durable wraps that keep freshness while enhancing shelf appeal
Household Goods: Functional labels that withstand daily use
Specialty & Craft Items: Unique, small-batch products with premium branding
What Are the Benefits of Shrink Sleeve Labels?
Shrink sleeve labels don’t just look good; they provide practical advantages that make them a cost-effective choice:
Shelf appeal: Bright, full-body graphics that cover every inch of your product
Cost savings: One sleeve replaces multiple labels, cutting production costs
Durability: Resistant to moisture, humidity, and handling
Recycling friendly: Optional perforated seams make sleeves easy to remove for simple recycling
How Shrink Sleeve Labels Are Printed and Applied
The process of creating shrink sleeve labels is designed to make packaging both efficient and customizable. Here’s how it works:
1. Design & Consultation
Everything starts with your brand goals and product needs. This includes container shape, graphics, and how you want your product to stand out on the shelf. You can start that here!
2. 3D Imaging & Prototyping
Before a single label is printed, you can preview your packaging with 3D mockups. This lets you see exactly how the sleeve will look once applied.
3. Proofs & Short Runs
If you want to test your design in real-world conditions, small proof runs are available before committing to a full production order.
4. Print & Apply
Now that your ready its time to print your labels! If you need a printer you can check out some good ones here! Once your sleeves are printed, they need to be applied to the product. This can be done in two ways:
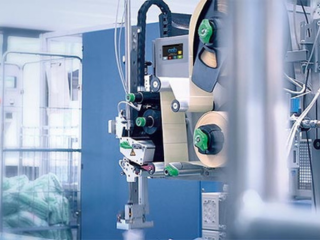
Label Applicator: A straightforward option for smaller operations or shorter runs.
Automated Applicators: For larger production environments, automated systems save time and reduce errors.
Our Recommendation: CAB applicators are known for their versatility and precision. Whether roll-on, blow-on, or tamp-on, CAB applicators ensure accurate label placement, seamless integration into production lines, and reduced downtime. They’re an efficient, cost-effective choice for companies ready to scale.
Choosing the Right Printer for Shrink Sleeve Labels
Not every printer can handle shrink sleeve labels. These labels are typically made from polyester or plastic films, requiring specialized printers that can maintain color accuracy and durability on flexible materials.
When selecting a shrink sleeve printer, look for:
The ability to print on shrink film without distortion
Consistent color accuracy for bold, vibrant designs
Flexibility to handle different container shapes and sizes
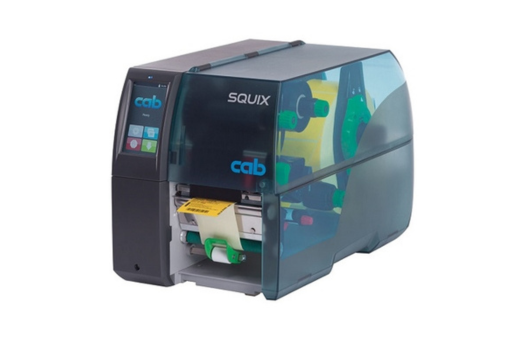
Our Recommended Product: CAB shrink sleeve printers deliver precision, reliability, and cost-effectiveness. They’re trusted in industries that demand consistent results, from beverages to cosmetics, ensuring your shrink sleeves look as good on the shelf as they do in design.
Tips for Getting the Best Results
Work with an experienced supplier: Guidance on design and materials helps avoid costly mistakes.
Optimize your graphics: Design with 360-degree coverage in mind to take advantage of the full sleeve.
Start with a prototype: Test before scaling with short-run printing.
Choose the right material: Consider moisture, humidity, and handling when selecting your film.
Ask our team! Fill out the quick form below or contact us here, and one of our Shrink Sleeve Label experts will help you!


